Prerequisites
Before creating sales agents in the app, please ensure the following Shopify B2B setup is complete:
- Create Companies, Company Locations, and Product Catalogs.
- Assign at least one customerto each Company Location.
- This customer is used as the impersonator to retrieve the correct product catalog and create draft orders on behalf of the company.
Steps
1. Add the B2B Sales Portal Block
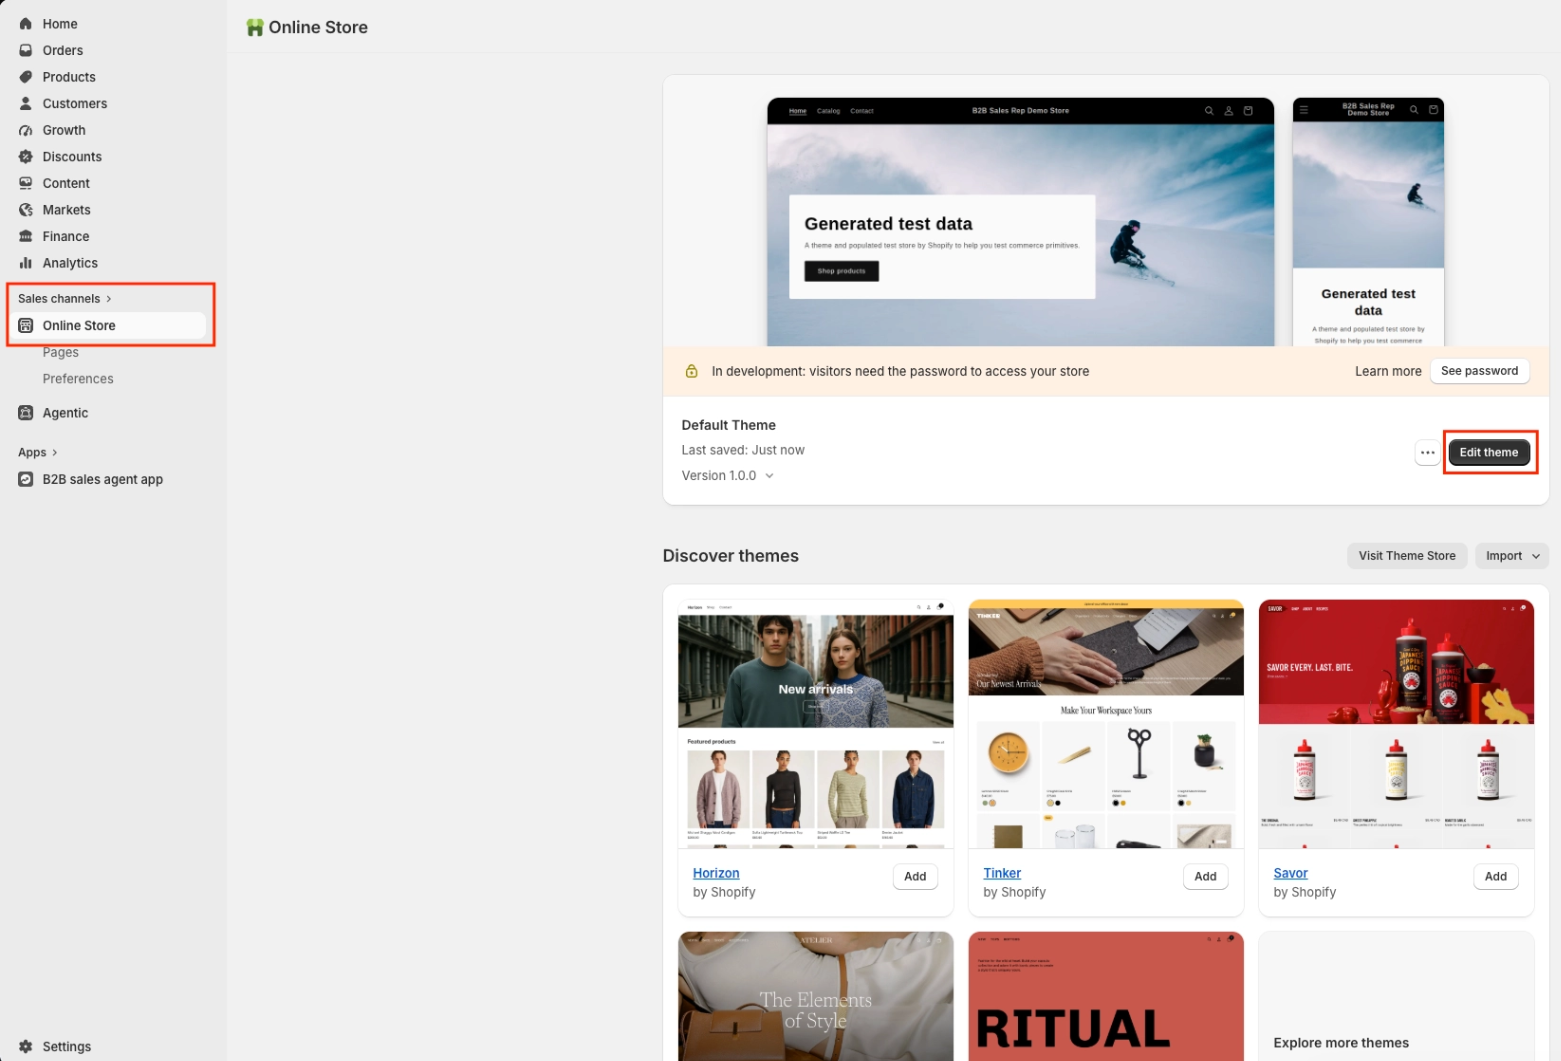
- Open Online Store → Themes → Edit theme.
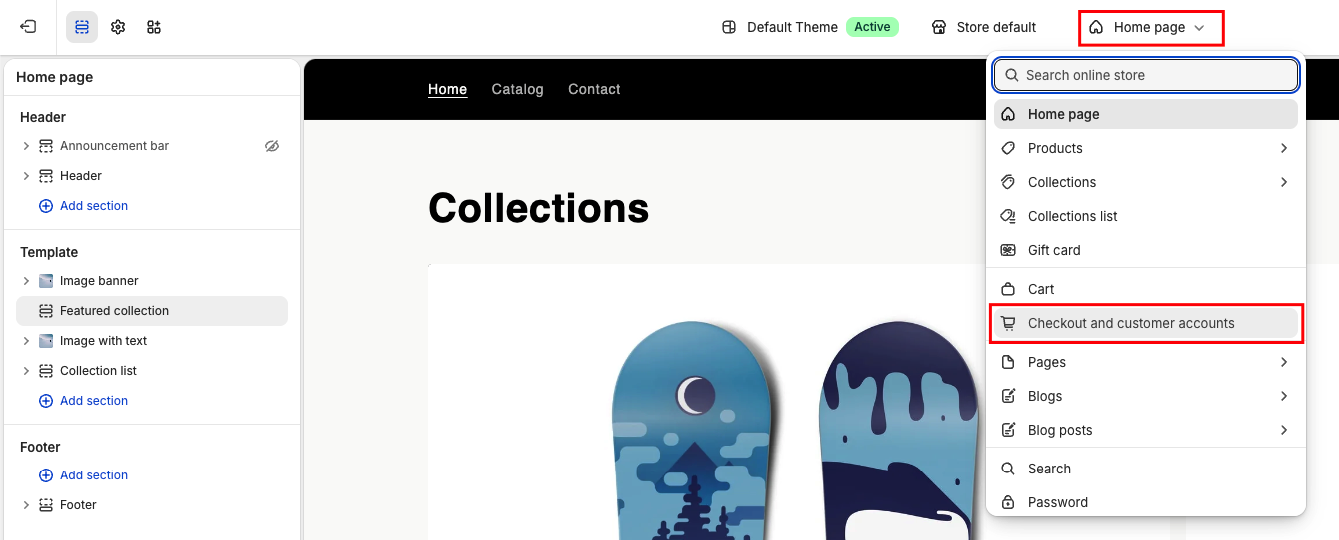
- From the page selector in the header, choose Checkout and customer accounts.
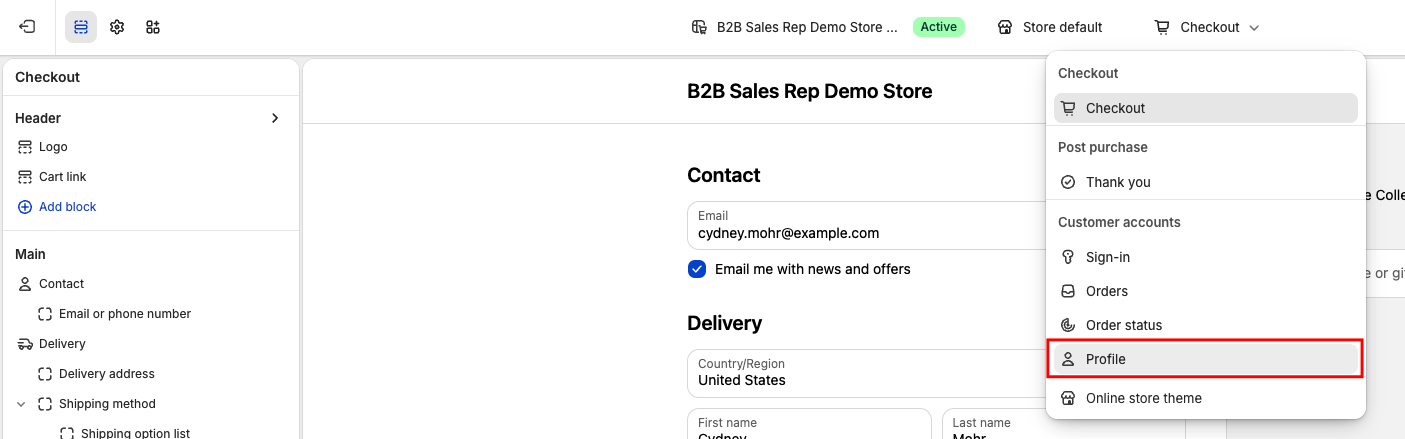
- Select Profile page.
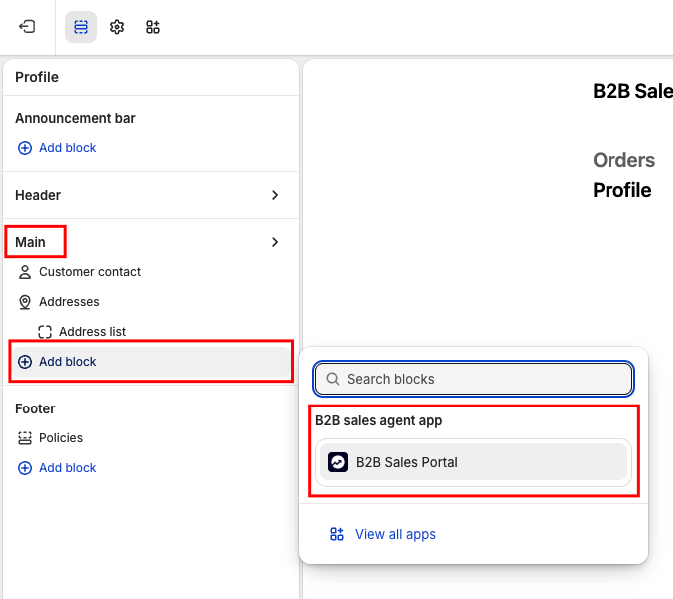
- In the left sidebar, open the Main section.
- Click Add block and select B2B Sales Portal.
- Save the theme.
2. Create a Sales Agent
- Open the B2B Sales Agent Ordering app and navigate to the Sales Agents page from the side menu.
- Click on the Create Sales Agent button.
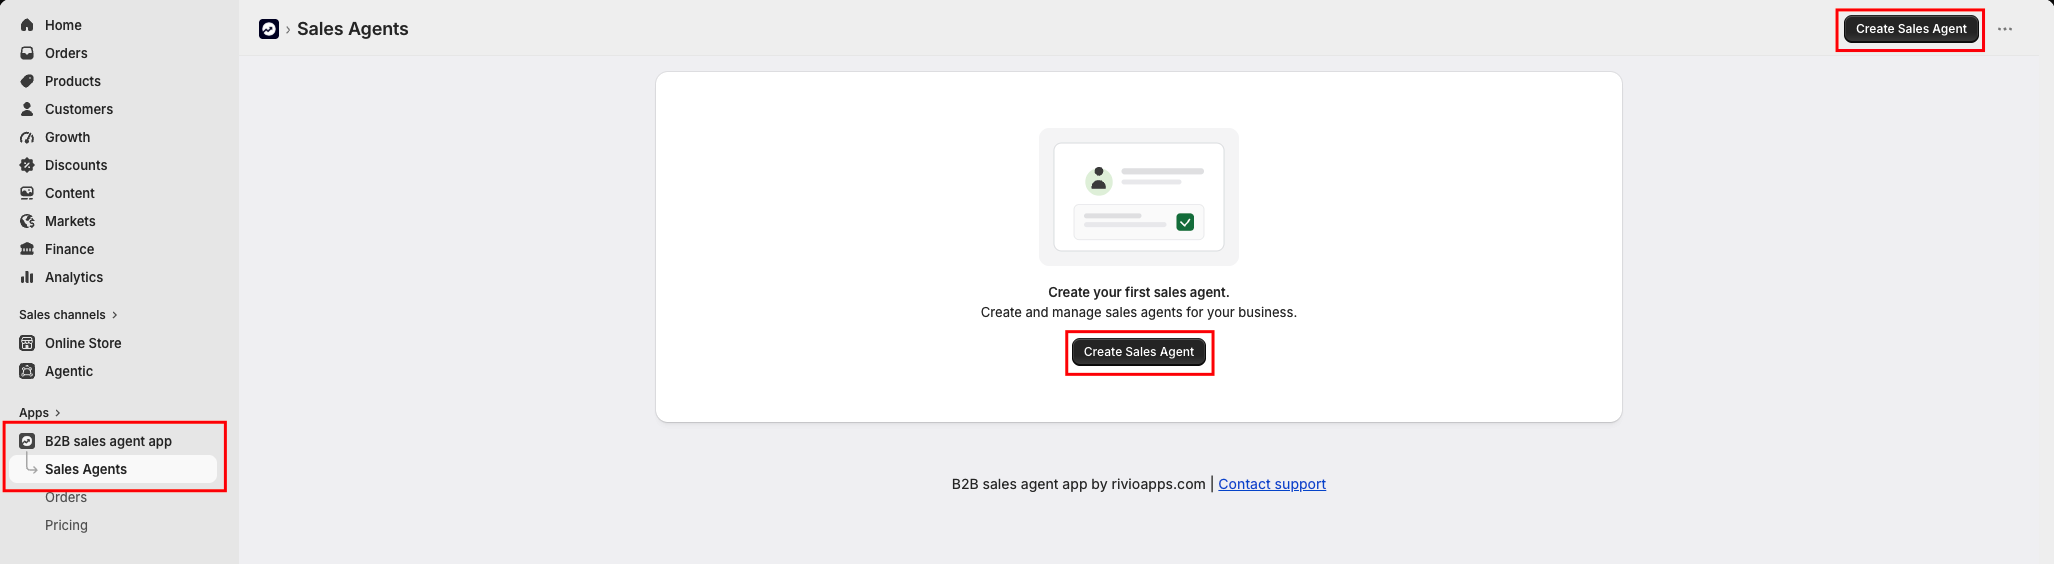
- Choose how you'd like to create this Sales Agent profile. You can either create a new Sales Agent profile or convert an existing Shopify customer into a Sales Agent by selecting Link Existing Shopify Customer.
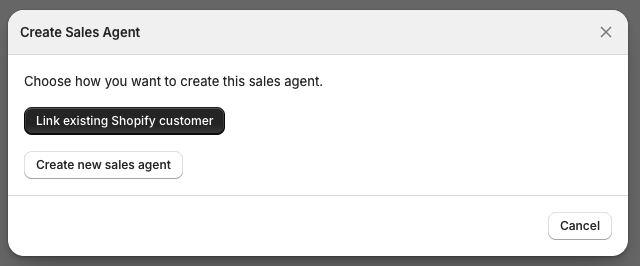
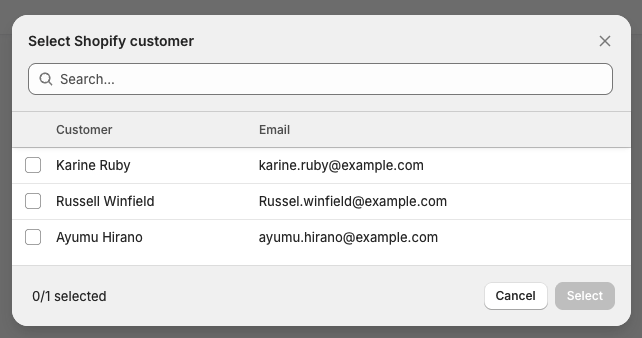
?(Option 1) If you are linking an existing Shopify customer account to the sales agent profile.- Select your preferred Shopify customer from your store to link their account to the Sales Agent profile.
- Assign the Sales Agent to one or more companies by selecting them from the dropdown list.
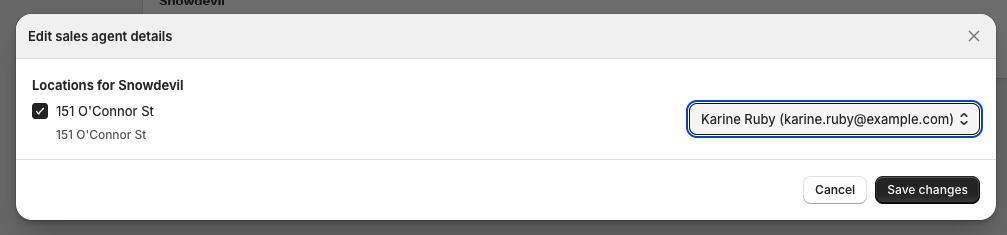
- Select the company, its associated location, and the customer (impersonator) that you want to assign to the Sales Agent. The Sales Agent will use the assigned customer to place wholesale orders on behalf of that company location. Click Save changes.
- Click the Save button in the header to save the Sales Agent profile.
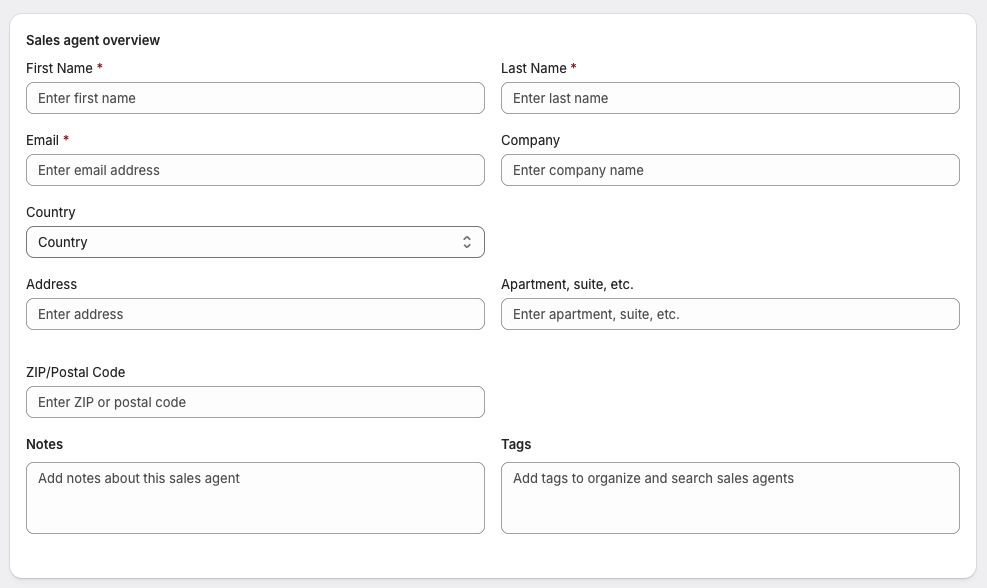
?(Option 2) Create a fresh new Sales Agent profile.Enter Sales Agent Personal Information such as:
- First Name
- Last Name
- Address
- Notes or Tag
Assign the Sales Agent to one or more companies by selecting them from the dropdown list.
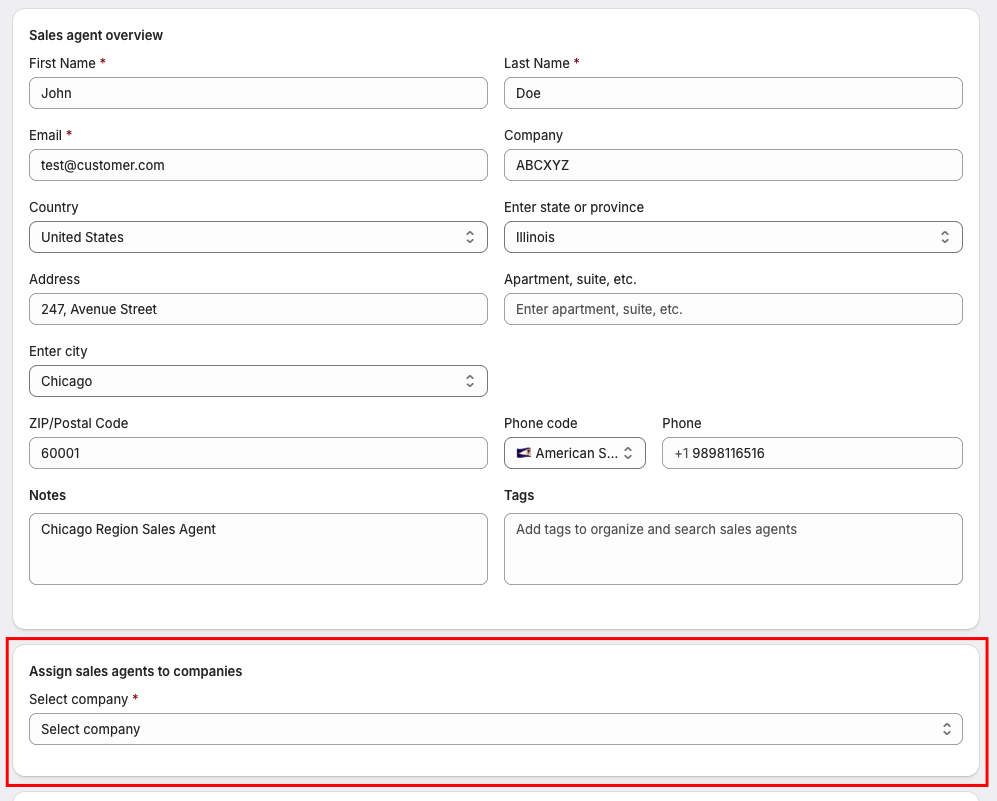
- Select the company, its associated location, and the customer (impersonator) that you want to assign to the Sales Agent. The Sales Agent will use the assigned customer to place wholesale orders on behalf of that company location. Click Save changes.
- Click the Save button in the header to save the Sales Agent profile.

IMPORTANT!! This customer will act as the impersonator when creating draft orders.
3. Assign Product Catalogs
Ensure each Company Location has an assigned Shopify B2B product catalog.
Without a catalog, products will not be available for ordering.
4. Log In to the Storefront
- Open the storefront.
- Sign in using Shopify Customer Accounts (OTP login) with the Sales Agent's email address.
5. Open the B2B Sales Portal
- Navigate to the Profile page.
- Click Open Sales Portal.
6. Select Company & Location
- Choose one of the assigned companies.
- Select the desired Company Location.
- Click Continue.
The app loads the product catalog assigned to that location.
7. Create a Test Order
- Add products to the cart.
- Submit the order.
A Shopify Draft Order will be created automatically.
Expected Results
- A Draft Order is created in Shopify Admin → Draft Orders.
- The order is created using the customer assigned to the selected Company Location (impersonator).
- The Sales Agent's email address is used as the contact email on the Draft Order.
- Only companies, locations, pricing, and catalogs assigned to the Sales Agent are available.
Important Notes
- Every Sales Agent is automatically created as a Shopify Customer in the store.
- The app is designed for Shopify B2B stores using Companies, Company Locations, Catalogs, and Shopify Customer Accounts.
If you have any questions or need help setting up the app, please contact our support team at support@rivioapps.com. We're happy to assist you.
Was this article helpful?
That’s Great!
Thank you for your feedback
Sorry! We couldn't be helpful
Thank you for your feedback
Feedback sent
We appreciate your effort and will try to fix the article
